
Selling products that customers can personalize, whether it’s engraving a name, choosing colors, or building a gift box, can instantly make your store stand out. But if you’re using Shopify, you might wonder: how exactly do you let shoppers customize their orders?
In this guide, Easify’ll walk you through the easiest ways to add customizable products on Shopify, from using Shopify’s built-in features to exploring third-party apps that make product customization simple and smooth.
Key Takeaways
- Customizable products boost engagement and sales by giving shoppers a sense of ownership and creativity.
- Shopify offers basic customization options through variants, line item properties, and product options, but these can be limited for complex needs.
- To go beyond Shopify’s default tools, you can use Shopify apps like Easify Product Options to create advanced customizations without coding.
Why You Need Product Customization on Shopify
Shoppers today want products that feel personal. Whether it’s a gift or something for themselves, they want to add their own touch. Product customization makes that possible, letting customers choose colors, add names, upload photos, or build bundles, turning a simple purchase into something unique.
Personalization doesn’t just make customers happy; it helps your store too. Customized products grab attention, keep shoppers engaged longer, and increase the chances they’ll complete their purchase.
It also helps your store stand out. In a crowded market, offering personalized options lets one product appeal to multiple audiences without constantly adding new items.
From a business perspective, customized products have higher perceived value, encourage repeat purchases, and strengthen your brand. By giving customers control, you show you value their individuality, building trust and loyalty along the way.
In short, product customization isn’t just a feature. It’s a smart way to boost engagement, sales, and brand identity.
How to Add Customization Options in Shopify
There are two main ways to add customization options in Shopify. The first is by using Shopify’s built-in variants, which allow you to create basic product options directly in the admin. This method works well if you only need simple choices like size, color, or material. It’s straightforward, but it does come with limitations when your customization needs become more advanced.
The second method is to use a third-party Shopify app, which gives you a much easier, no-code way to add rich customization fields and manage them visually. Apps usually offer more flexibility—like text inputs, image uploads, color swatches, or conditional logic—without requiring you to touch any code.
Both methods can help you display more detailed and organized product information on your store, but the best choice depends on how complex you want your customizations to be.
Method #1: Using Shopify’s Built-in feature
In this section, Easify’ll focus on the basic customization tools that Shopify already provides. If you need something slightly more advanced, you can check out these guides:
- How to Add a Table in Shopify Product Page Quickly and Easily
- How to Add Swatches to Products in Shopify
For even more complex changes, you can go deeper into Shopify theme code. Technically, you can customize almost anything, you just need to decide how comfortable you are working with code and how much time you want to invest.
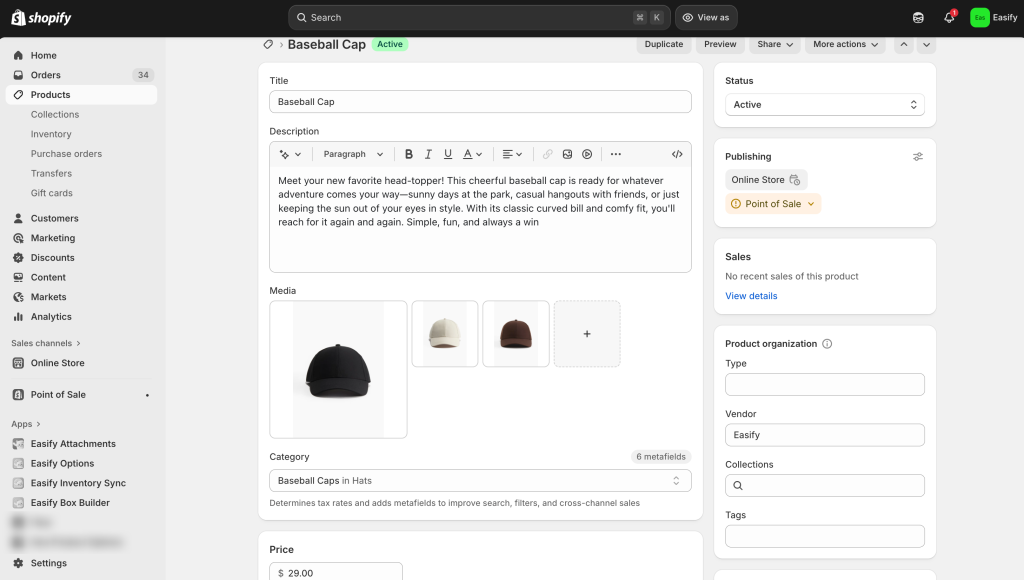
Step 1: Go to Your Product and Set Up the Basics
In your Shopify Admin, select the product you want to edit (or create a new one). Add the essentials like name, description, price, and images, just like you normally would.
Step 2: Add Variants
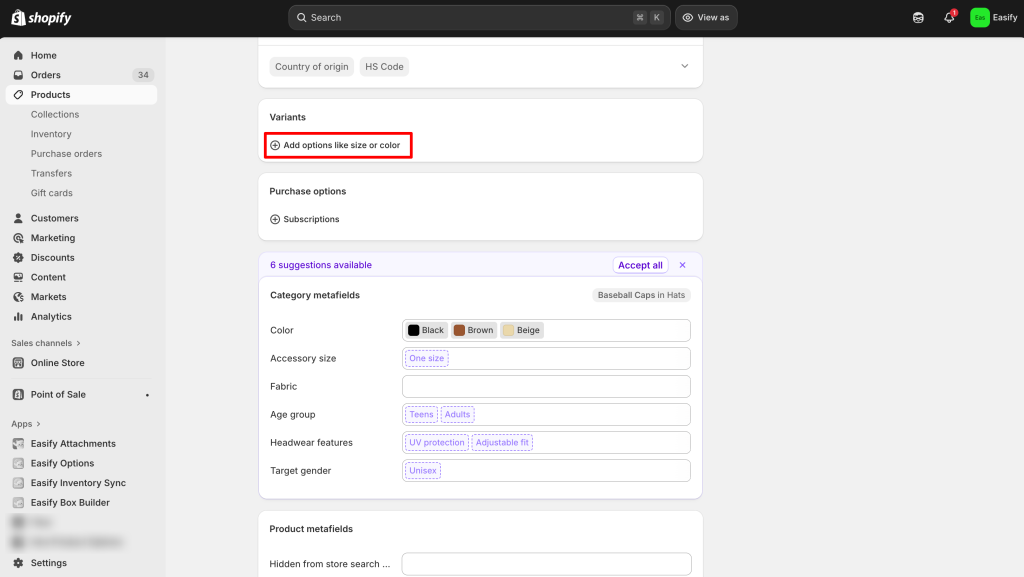
Case 1: If you’re using a category metafield
Scroll down until you see the suggested category metafield section. Add or edit the relevant information there.

After that, scroll back up to the Variants section and click “Add options like size or color.” Shopify will automatically suggest option values based on the metafield you filled in. Choose one of the suggestions, and Shopify will generate the variants for you.
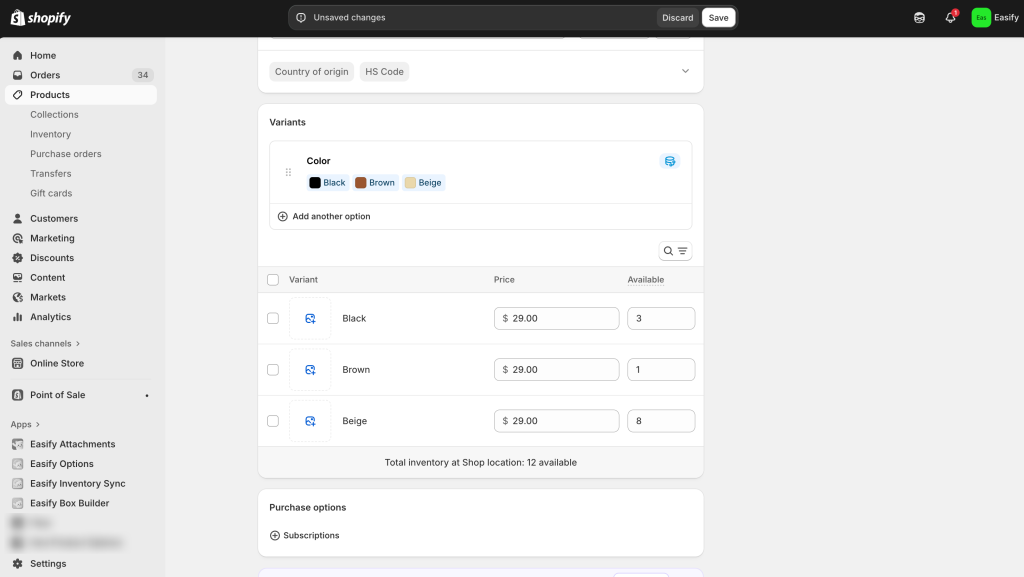
You can then set the price, inventory, SKU, and other details for each variant.
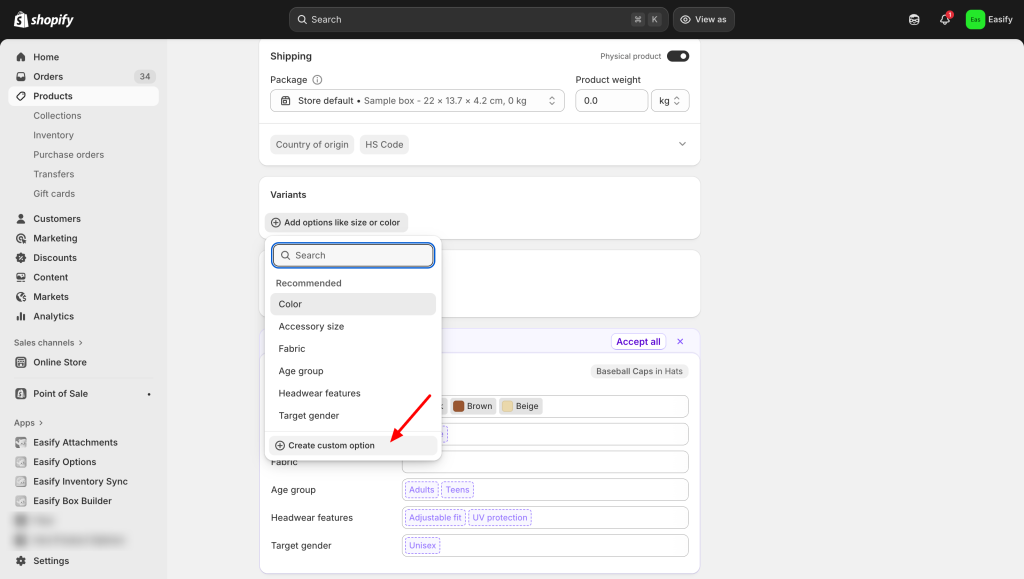
Case 2: If you’re not using a category metafield
If you don’t want to follow the metafield suggestions, simply click “Add options like size or color.”
Then choose Create custom option, enter the option name and values, and adjust the price and inventory settings as needed.
Step 3: Add More Variants (If Needed)
If your product requires multiple option sets—such as size and color—you can continue adding more options. Shopify will automatically generate all possible variant combinations.

Just review each one to ensure pricing, inventory (if you assign them per variant) are correct.
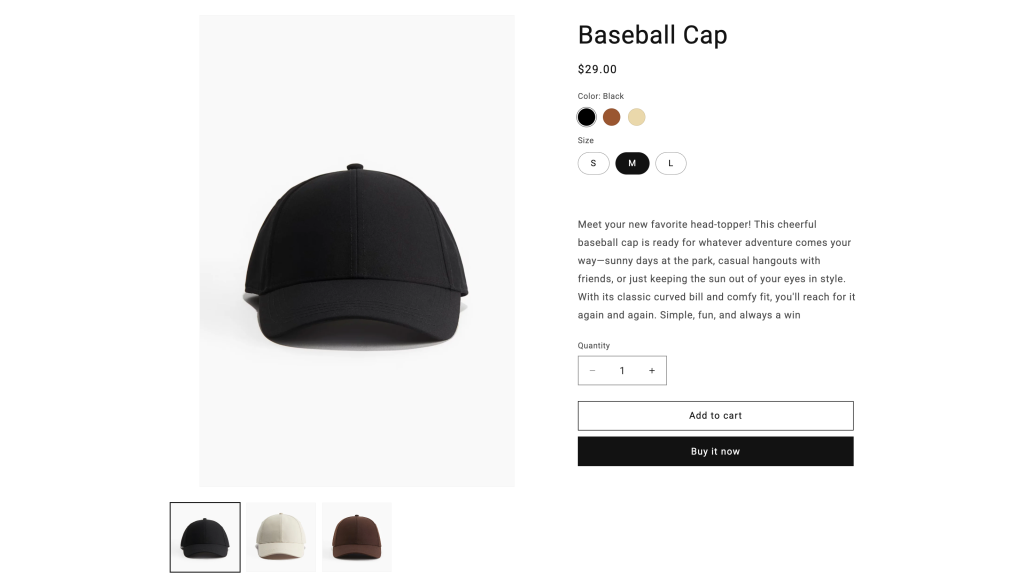
Step 4: Save and Preview Your Product
Once everything is set up, click Save. Then preview your product page to make sure all variants display correctly and the customer experience feels smooth.
Method #2: Using Easify Product Options app
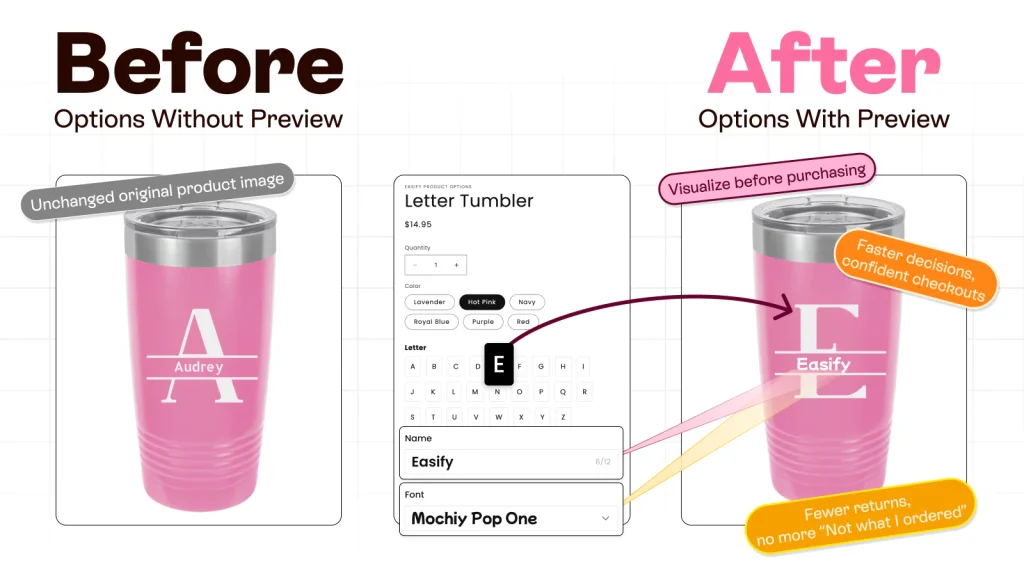
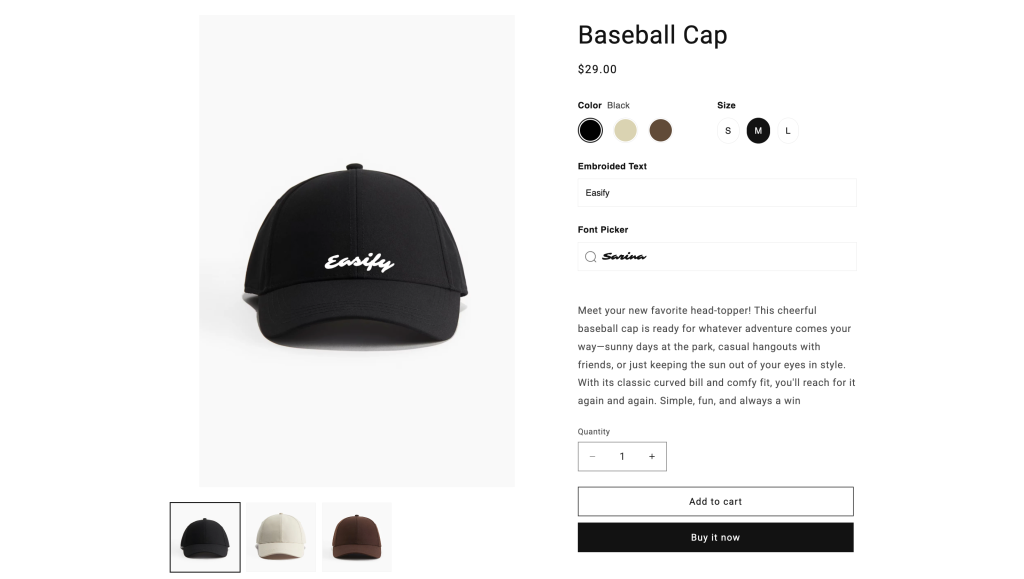
If you want a more flexible and customizable option than Shopify’s built-in variants, a third-party app like Easify Product Options is a great choice. Without touching any code, it lets you add a wide range of customization options, like text boxes, date pickers, font pickers, live previews, and more, giving your customers a richer shopping experience.
Step 1: Find and Install the App
Go to the Shopify App Store, search for Easify Product Options, and click Install. Once added to your store, open the app and follow the quick setup guide to get started.
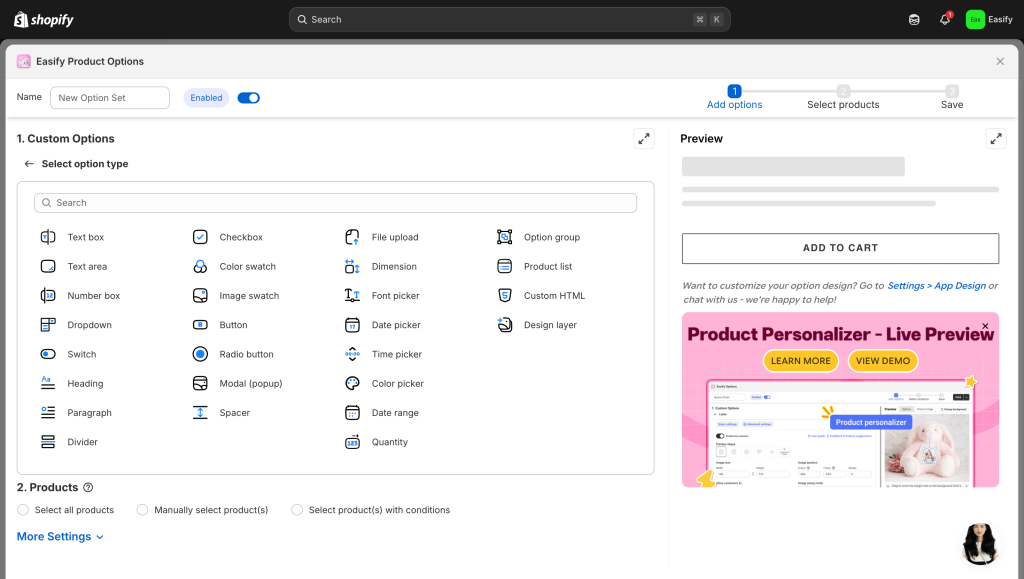
Step 2: Create a New Option Set
From your Easify dashboard, click Create New Option Set, then select the type of option you want to add.
Click on the option to edit its details—for example, if it’s a text box, you can set a character limit, add an extra price, or enable live preview (perfect for engraving or monogrammed products).

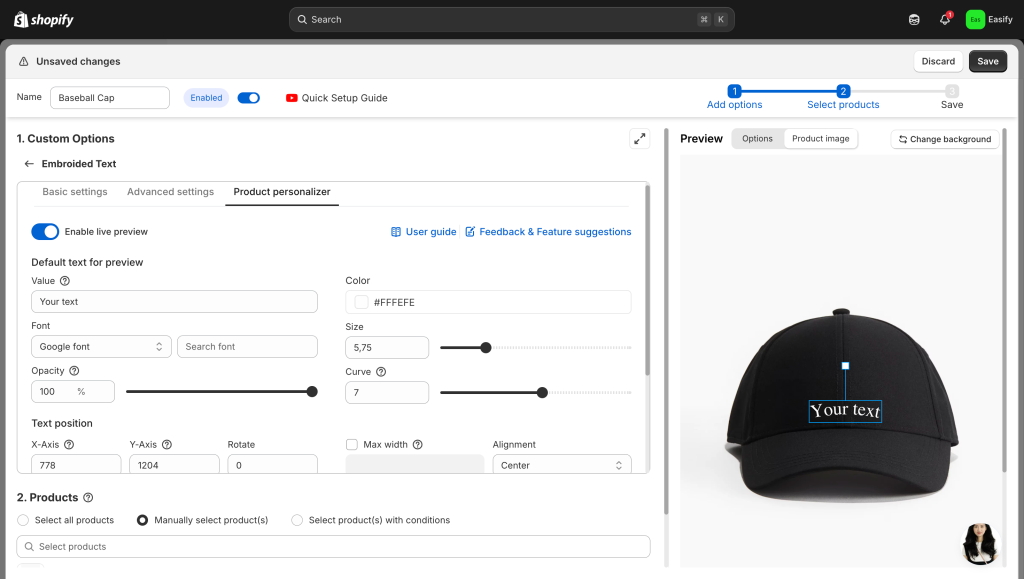
Step 3: Continue Adding Options
You can keep adding more customization options as needed, like dropdowns, checkboxes, or image uploads. Easify lets you combine multiple options in a single set, so customers can fully personalize their product without confusion.
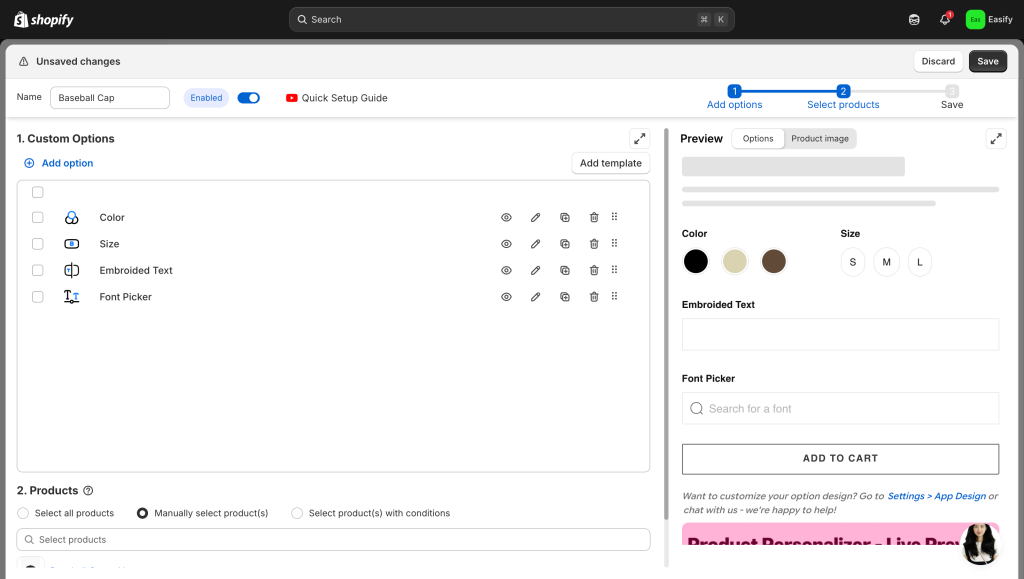
Step 4: Apply to Products
Choose which product(s) you want the option set to appear on. You can apply it to a single product or multiple products at once, making it quick to manage your store.

Step 5: Save Changes
Click Save to finish. Your new customization options will now appear on the product page, giving customers more ways to personalize and enhancing their shopping experience.
Final Thoughts
Adding customizable products on Shopify is a powerful way to make your store stand out, increase customer engagement, and boost sales. Whether you use Shopify’s built-in variants for simple options or a third-party app like Easify Product Options for advanced, flexible customizations, the goal is the same: give your customers more control and a personalized shopping experience.
Remember, even small customization options can make a big difference in how your products are perceived. From text boxes and color swatches to live previews and font pickers, every little detail helps your customers feel involved and confident in their purchase.
With the right tools, setting up customizable products doesn’t have to be complicated. Take a step today to make your Shopify store more engaging, memorable, and ready to meet the growing demand for personalized products.
Start using Easify now and bring your product customization to the next level!


