
Want to give your Shopify store a more polished, shopper-friendly look? Adding color or pattern swatches can do just that. Instead of reading a plain text label like “Red” or “Blue”, your customers can instantly see the actual color or design they’re selecting. This makes the buying process faster, more engaging, and—let’s be honest—a lot prettier.
In this guide, we’ll walk you through exactly how to add swatches to your Shopify store, whether you’re using built-in features or third-party apps. By the end, you’ll be able to offer a smoother product selection experience that can help boost both customer satisfaction and sales.
Key Takeaways
- Color swatches and image swatches make product selection easier and faster for shoppers.
- They enhance the overall shopping experience and improve your store’s visual appeal.
- You can add both types of swatches using Shopify’s built-in features or with an app — like Easify Product Options, which makes it quick and simple.
- A well-implemented swatch system can boost customer confidence and drive more sales.
Why Swatches Make Shopping Easier
Shoppers make decisions faster when they can see their options instead of just reading them. A plain text label like “Blue” or “Floral Print” doesn’t always give customers the full picture, but a color or image swatch instantly shows them exactly what they’re getting. This not only saves them time but also makes the buying process more enjoyable.
Swatches also make your store look more professional and organized. Whether you’re selling clothing, furniture, or accessories, visual options give a polished impression and encourage shoppers to explore more. By making product choices clearer and more engaging, you reduce hesitation—and that can directly lead to more conversions.
How to Create Swatches for Your Shopify Store
Method #1: Using Shopify Built-in
This method uses Shopify’s default category metafields to set up swatches. It works for simple setups, but if you want more customization — like unique styles or extra display options — you’ll need to edit your theme code
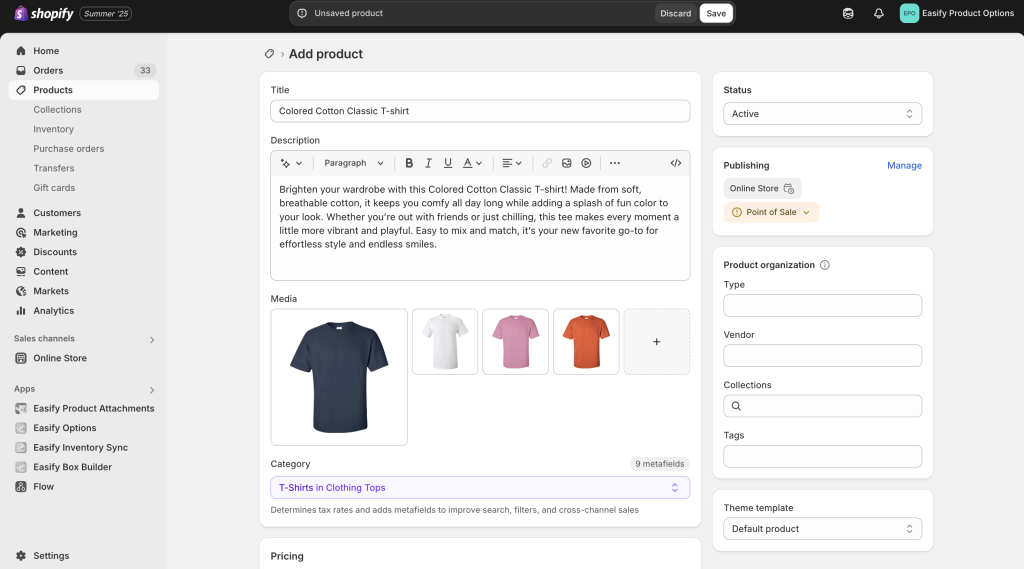
Step 1: Go to Your Product and Set Up the Basics
In Shopify Admin, open the product you want to edit (or create a new one), then fill in the name, description, price, and images as usual — but skip adding variants for now.
Step 2: Scroll to the Category Section
In the Category field, select the most accurate category from Shopify’s Standard Product Taxonomy, making sure it includes the Color category metafield (for example, Apparel & Accessories > Clothing).
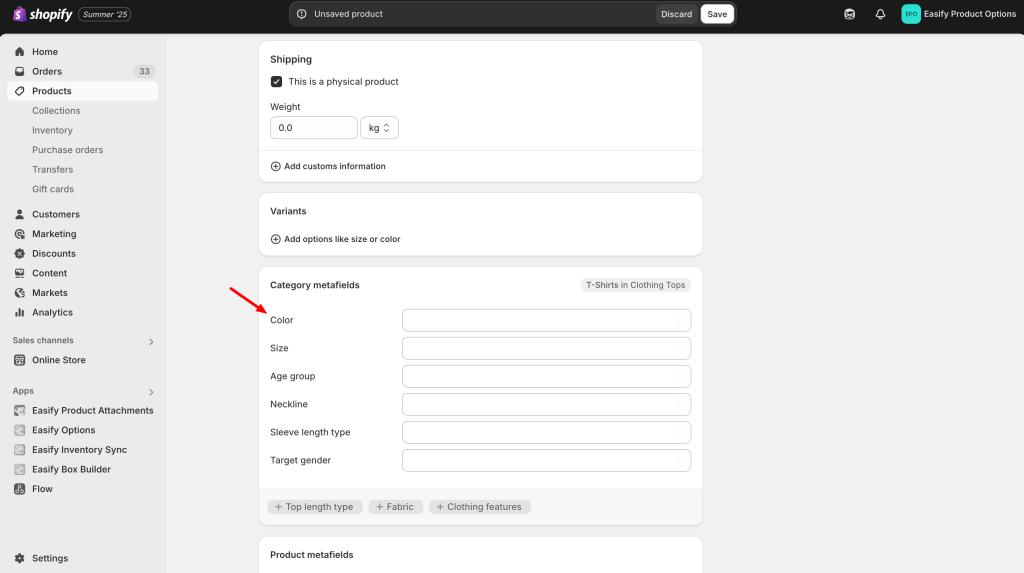
Step 3: Access Category Metafields
After selecting the category, scroll down to the Category Metafields section and locate the Color metafield — this is where you’ll add your swatches.
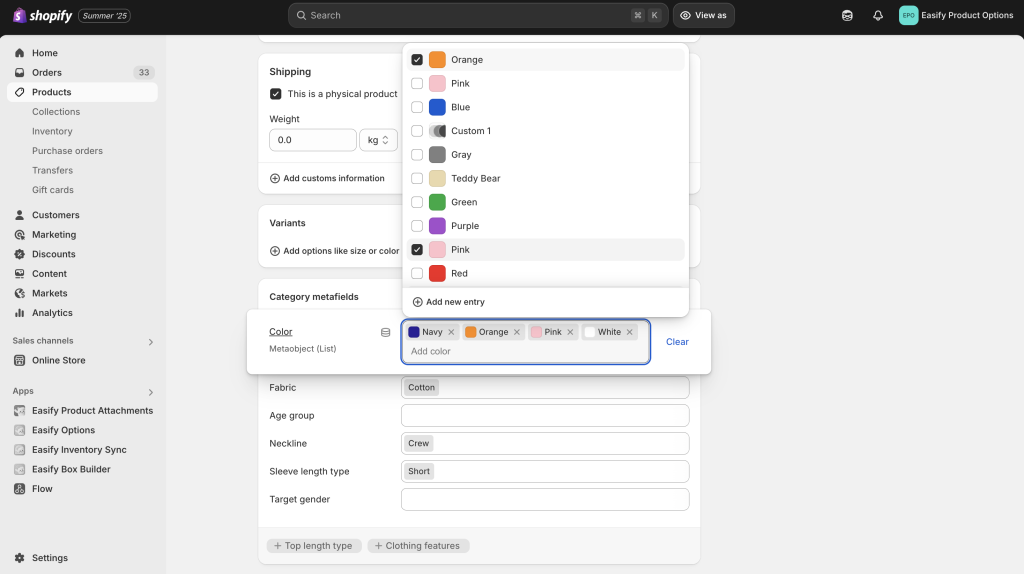
Step 4: Add a New Image Swatch Entry
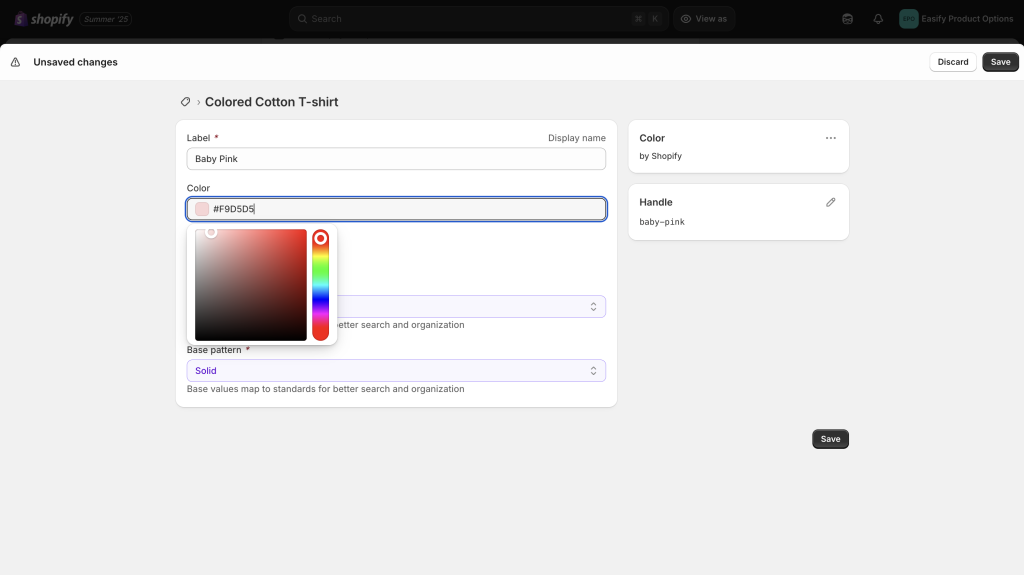
Under Color, Shopify can auto-set the color metafield for you, or you can choose an existing one or click ‘Add new entry’ to add a new color with a descriptive label, such as ‘Baby Pink’ or ‘Dark Blue”.
Step 5: Upload the Image Swatch (optional)
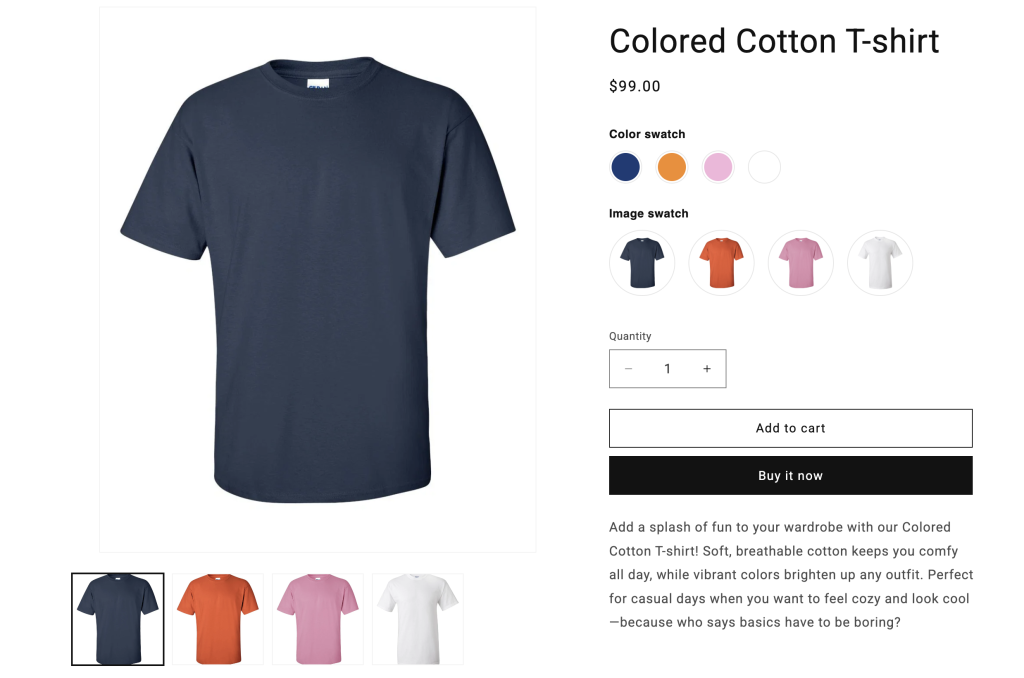
If you want to upload your swatch image (e.g. you want your swatch is the image of your navy shirt, not just the navy plain color swatch), click select image and upload your image from the media library or your device.
Even if you’re using an image swatch, Shopify still requires a base color — select one, then click Save.
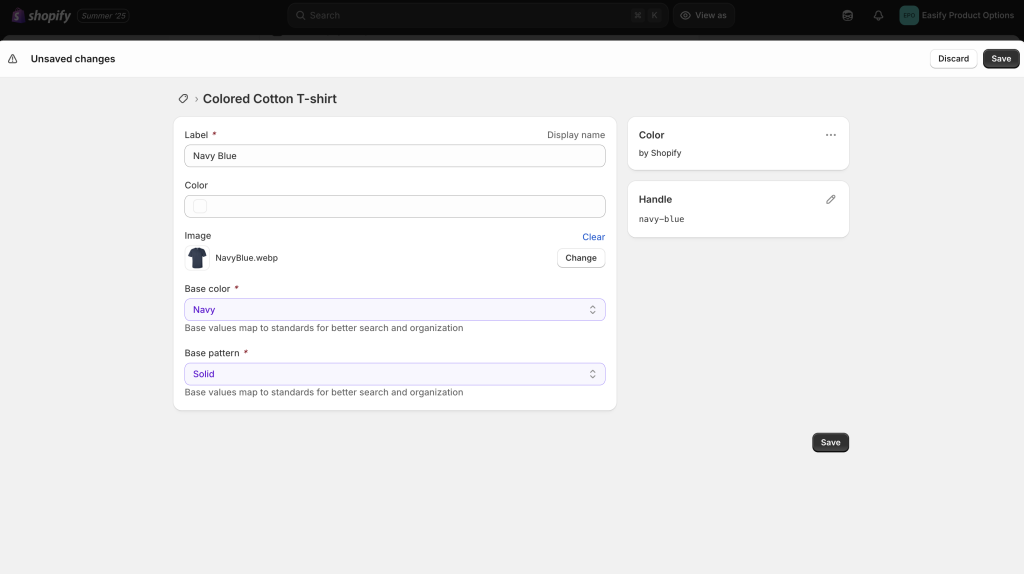
Step 6: Add More Swatches if Needed
Repeat Add new entry for each additional color or design swatch you want to create, saving after each one.
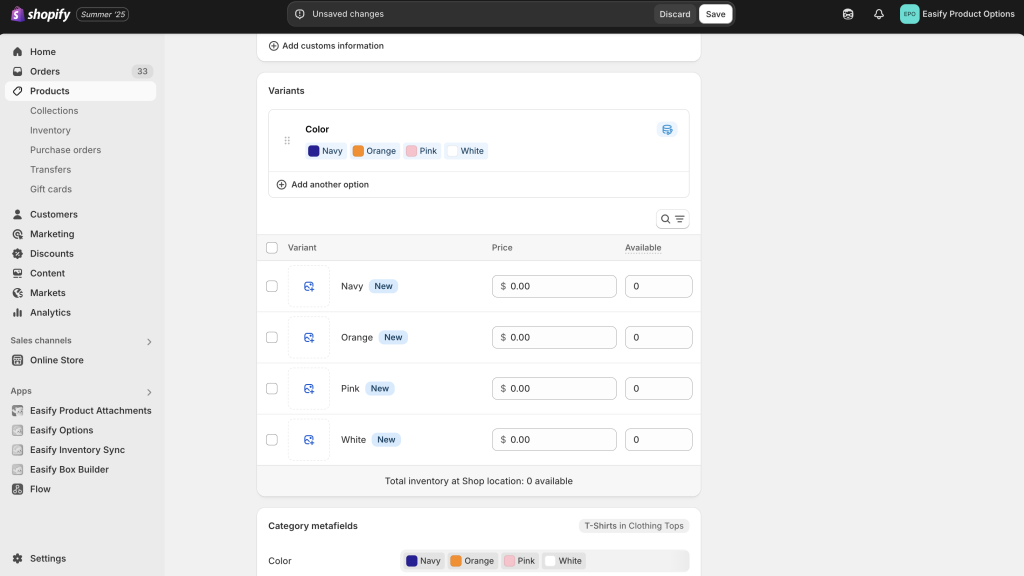
Step 7: Link Metafields to Product Variants
Scroll back up to the Variants section, click Add Options, and choose Color — Shopify will automatically pull your swatch values from Category Metafields. Then set price and inventory as usual.
Step 8: Save and Preview
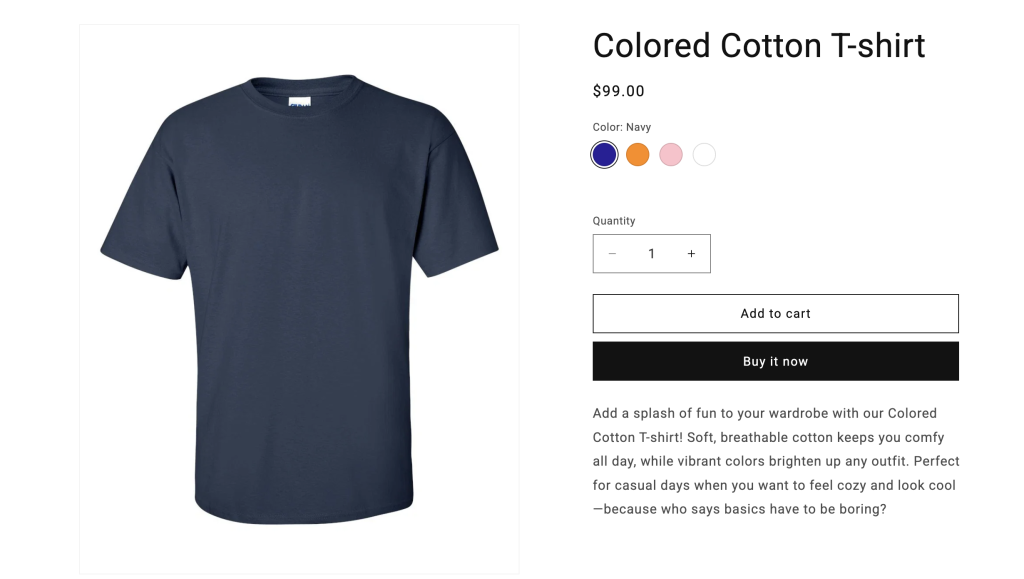
Click Save, then open your product page to preview how the image swatches appear for customers.
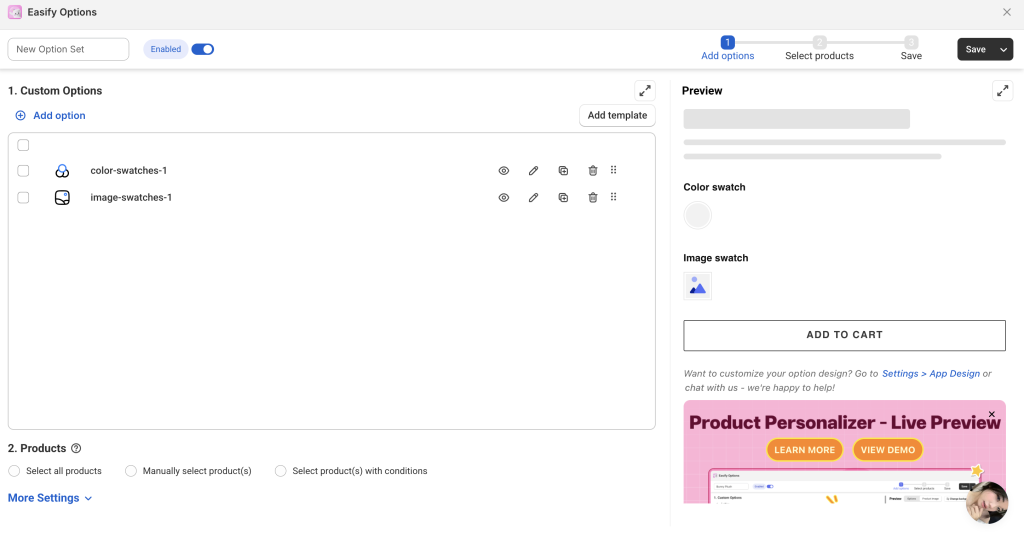
Method #2: Using Easify Product Options
If you don’t feel like messing around with code or digging through theme settings, Easify Product Options is the easy way to get swatches on your Shopify store. In just a few clicks, you can add both color swatches and image swatches, plus a bunch of other option types. It’s perfect if you want more control over how your options look, or if your theme just doesn’t have swatches built in.
With Easify, you can match swatches to your products’ exact colors or images, link them to the right variants, and mix them with other custom options. The result? A smoother shopping experience that’s quicker and more fun for your customers.
Here’s how to set it up step by step.
Step 1: Find and install the app
Head over to the Shopify App Store, type Easify Product Options into the search bar, then hit install. Once it’s added to your store, open it up and follow the quick activation steps inside the app.
Step 2: Create your option set
In the Easify dashboard, click “Create Now” to create a new option set. Here, you can choose Color Swatch or Image Swatch—or even mix both if your product needs multiple styles.
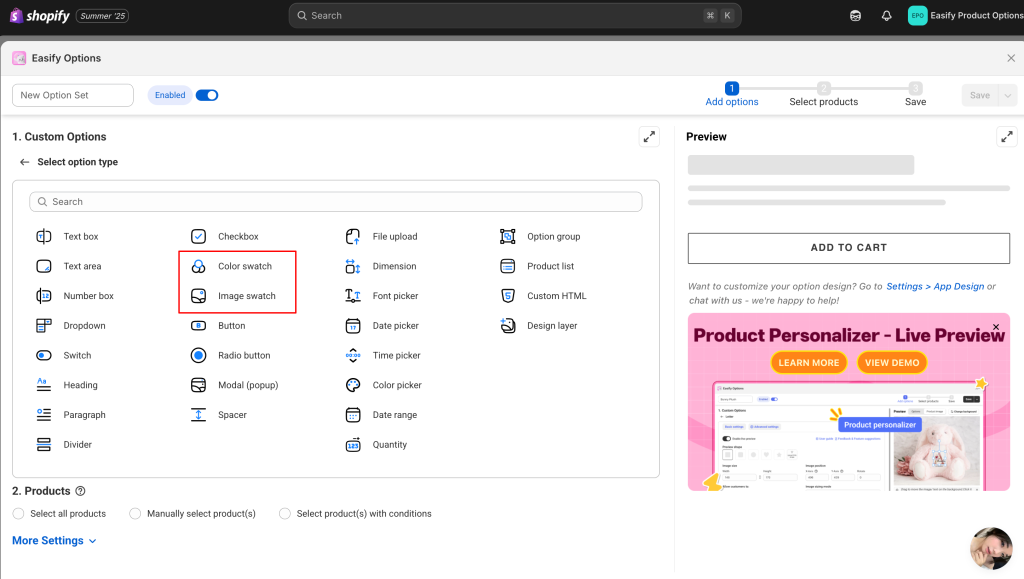
Step 3: Set up your swatches
For a color swatch, simply select the exact shade you want. For an image swatch, upload a clear image that shows off the variant. This way, customers know exactly what they’re clicking on.
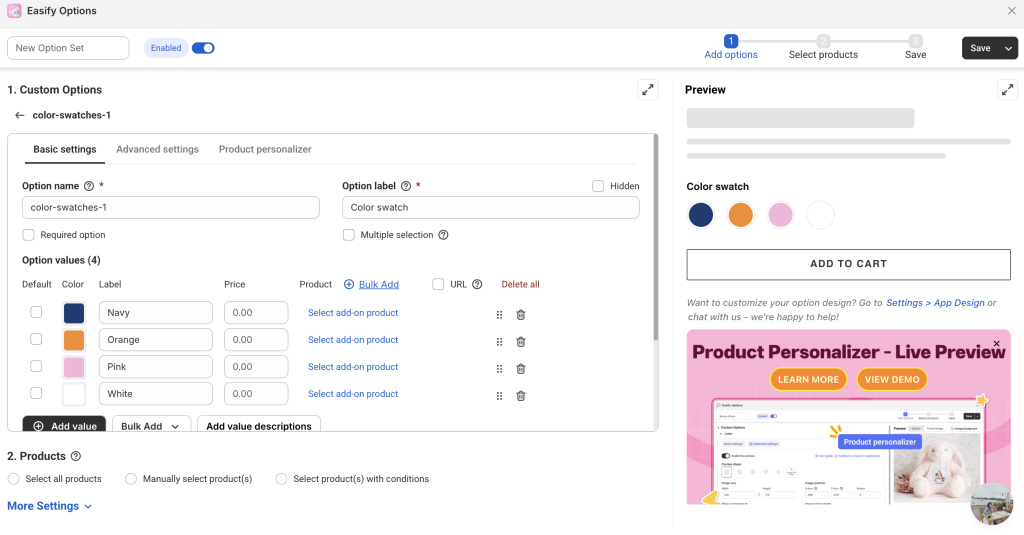
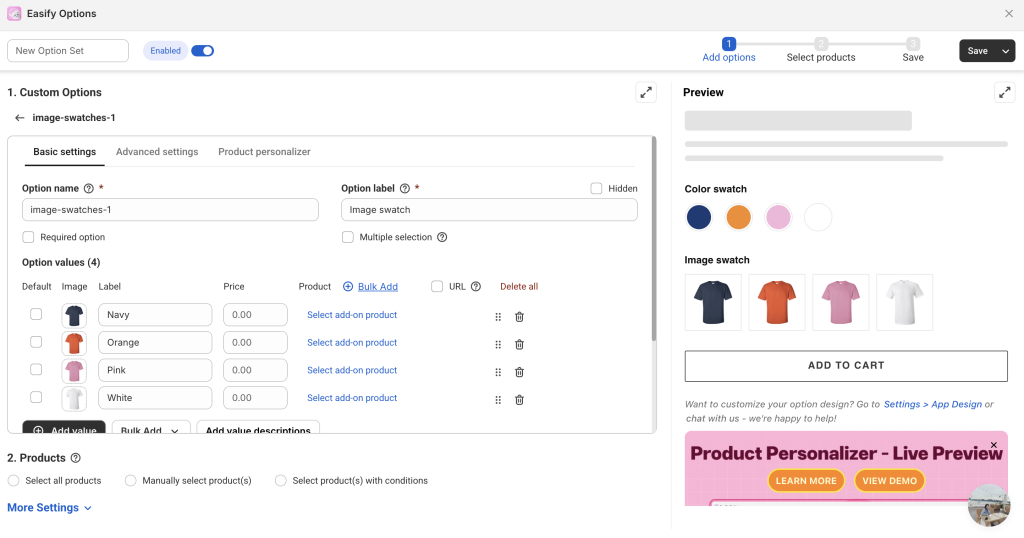
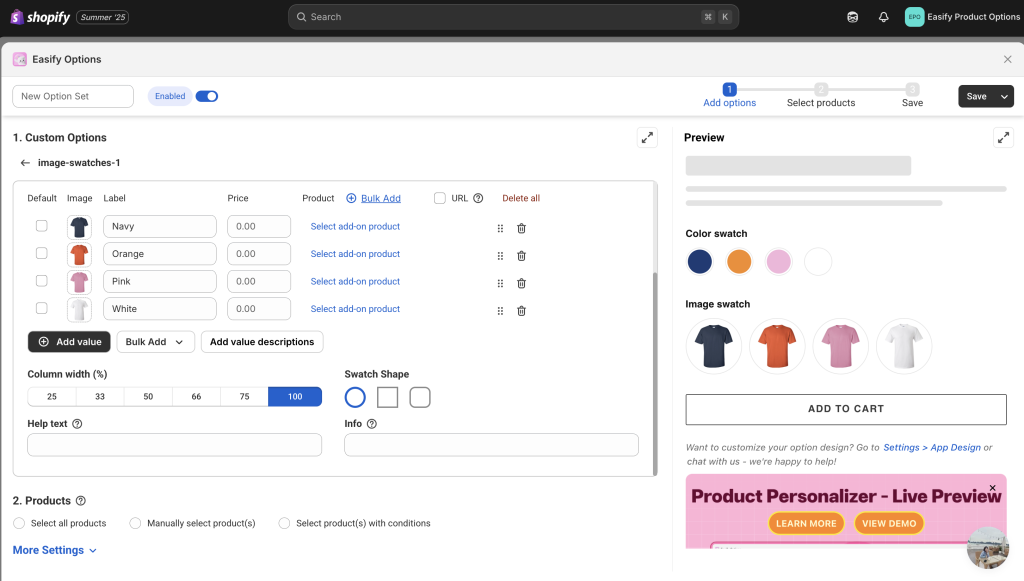
Step 4: Customize the look
Make your swatches match your store’s style by adjusting the shape, size, and spacing. Whether you want them round, square, big, or small—it’s all up to you.
Step 5: Assign to products
Choose which product(s) this option set will apply to. You can assign it to a single item or multiple products at once.
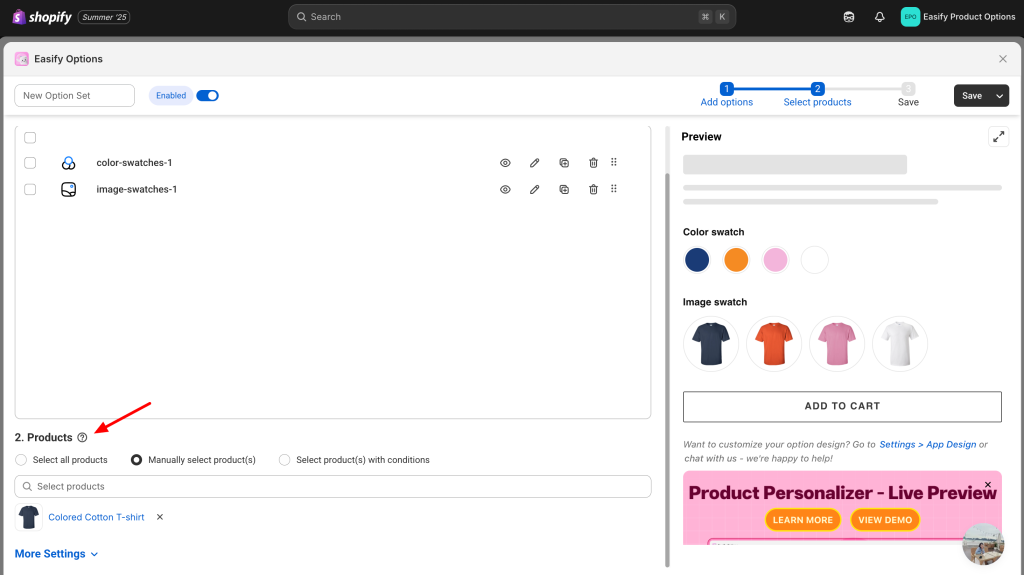
Step 6: Save your work
Hit Save and you’re all set! Your swatches will now appear on the product page, ready for customers to click and shop.
FAQ
You can enable swatches on Shopify in two main ways: by using Shopify’s built-in category metafields or with an app like Easify Product Options for more customization and an easier setup. With Shopify’s native method, you assign a product category with a color metafield, add swatch values (colors or images), link them to your product variants, and save to display them on the product page. If you prefer a faster, code-free approach, Easify lets you create color or image swatches, customize their look, assign them to products, and publish them in just a few clicks.
You can add a color swatch in Shopify either using its built-in features or through a third-party app. With the native method, open your product in Shopify Admin, assign it to a category that includes the Color metafield, then scroll to Category Metafields and add your color options—either as plain colors or by uploading swatch images. Next, link these colors to your product variants in the Variants section and save your changes so they display on the product page. For more customization and an easier setup, apps like Easify Product Options let you quickly create and style color or image swatches without editing theme code.


