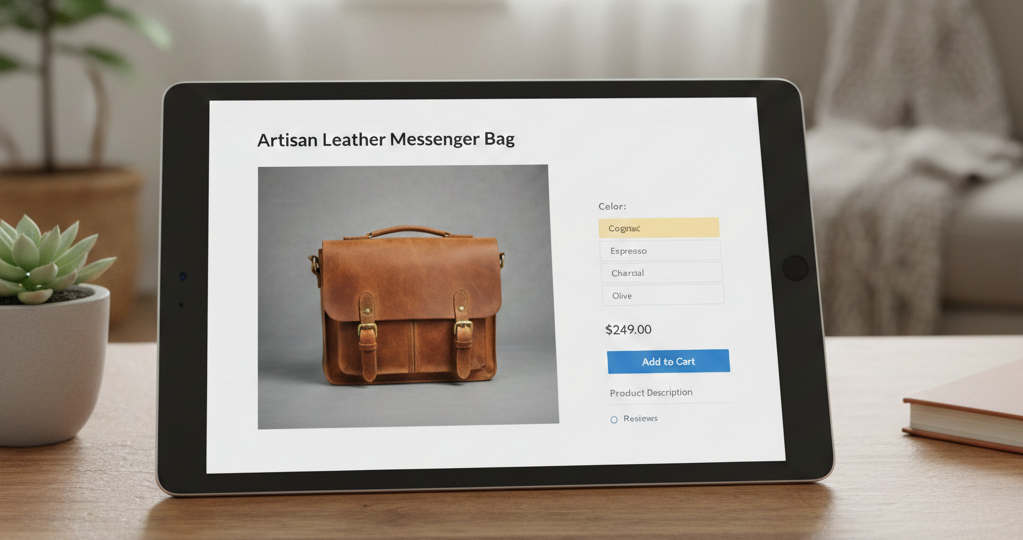
Giving customers clear, simple choices is one of the most important parts of a high-converting product page — and that’s exactly where dropdown menus come in.
A dropdown on your Shopify product page allows shoppers to quickly select options like size, color, material, customization, or add-ons without cluttering the page with too many buttons or swatches. It keeps your layout clean, makes decision-making easier, and creates a more professional shopping experience.
The good news? You don’t have to be a developer to add a dropdown to your Shopify store.
Whether you prefer a no-code built-in option, a flexible app-based solution, or something more advanced, Shopify gives you multiple ways to make it happen.
Method 1: Add a Dropdown Using Shopify’s Built-In Theme Editor
If you want the simplest way to add a dropdown to your Shopify product page, the built-in theme editor is the best place to start. This method uses Shopify’s native variant picker, so there’s no need to edit code or install apps.
Follow the steps below to turn your product options into a clean dropdown menu:
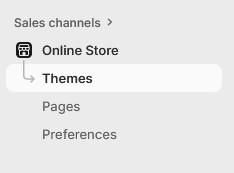
1. Go to your Shopify Admin and choose the sales channel you want to edit
From the left sidebar of your main Shopify dashboard, click Online Store → Themes. This is where you can manage and customize your current live theme.
2. Open Shopify’s theme editor
Next to your active theme, click the Edit theme button. This will open Shopify’s built-in theme editor in a new screen where you can visually adjust your store layout.

3. Navigate to the product page template
At the top of the editor, use the dropdown menu to switch to Products → Default product (or the product template you want to modify). This ensures the dropdown appears on product pages.

4. Add a new block in the Product Information section
In the left sidebar, you’ll see a list of sections that make up the page. Look for Product Information. Hover your cursor where you want your dropdown menu to appear and click Add block.

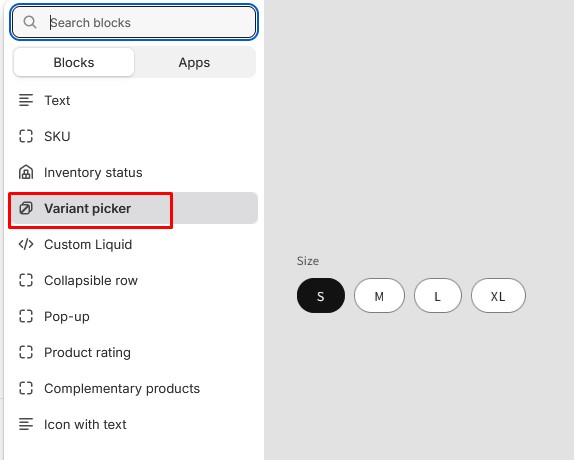
5. Choose the “Variant Picker” block
From the list of available blocks, select Variant picker. This block is responsible for displaying product options like size, color, or material.
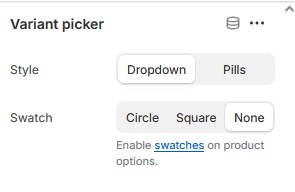
6. Switch the picker style to “Dropdown”
Click on the newly added Variant Picker block to open its settings. Find the Type or Style option and change it to Dropdown instead of buttons or swatches.
7. Save your changes
Click Save in the top-right corner of the theme editor. Visit a product page in your storefront to confirm the dropdown menu is now visible.

Important notes:
- This method only works if your product already has variants (such as Size or Color) set up under Products → Variants.
- If your product doesn’t have variants yet, Shopify won’t display the variant picker—even if the block is added.
- Different themes may use slightly different wording, but the process is similar in most Online Store 2.0 themes.
This no-code method is perfect for beginners who want a quick and clean way to display product options without complicating the setup.
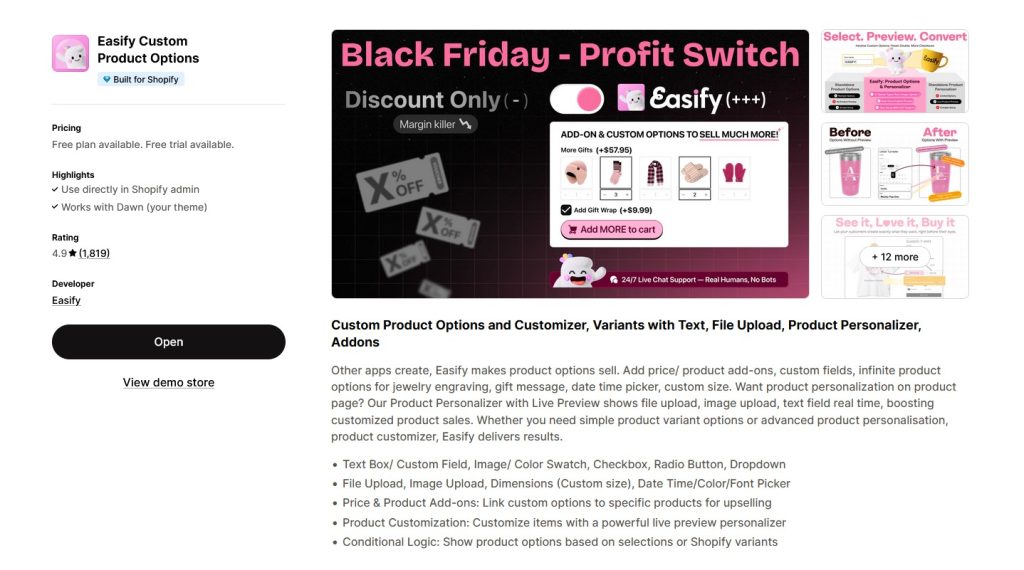
Method 2: Use the Easify Custom Product Options App
If you need more flexibility than Shopify’s built-in variant system allows, using an app is the best solution. Easify Custom Product Options lets you add dropdown menus (and other input fields) to your product pages without touching any code — and with far more customization options.
Here’s how to set up a dropdown using the Easify app:
1. Install and activate the app
Go to the Shopify App Store and install Easify Custom Product Options. Once installed, follow the instructions & activate the app to begin creating custom options.
2. Create a new option set
Click the Create Option Set button and give your new set a clear, descriptive name (for example: “Size” or “Material”). This set will contain the dropdown menu you build.
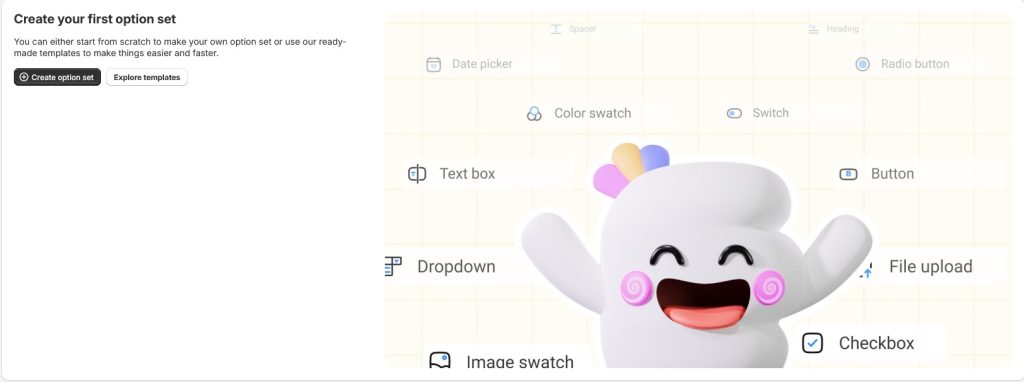
3. Add a dropdown option
Inside the option set, click Add Option and select Dropdown as the option type. This tells Easify that you want customers to select one value from a dropdown list.

4. Edit your dropdown settings
Click the Edit button (the pencil icon) on the dropdown option you just created. Then fill in the following key fields:
- Option Name — This appears in the cart, checkout, and order details. Use a clear, meaningful name.
- Option Label — This is what customers see on the product page above the dropdown.
- Option Values — Add the choices that will appear in the dropdown (for example: Small, Medium, Large). You can also match these with existing variant values if needed.
- Additional Configuration — Customize details like:
- Placeholder text (e.g., “Choose an option”)
- Help text or notes
- Info tooltips
- Column width and layout

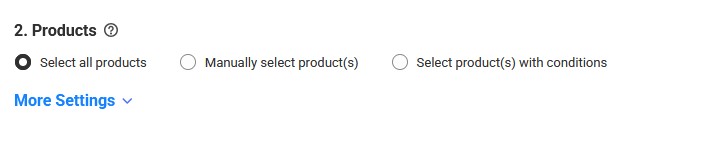
5. Choose where the dropdown appears
Select which product(s) or product collections this option set should apply to. This allows you to use the same dropdown on multiple products or limit it to just one.
6. Save and publish
Click Save and your dropdown will now display on the selected product page(s). Visit your storefront to view it in action.

✅ Why use Easify for dropdowns?
- No variant limit – Shopify’s 3 options limit doesn’t apply
- Perfect for add-ons, personalization, and custom fields
- Works with text inputs, radio buttons, checkboxes, and more
- Shows selected values in cart, checkout & order confirmation
This method is ideal if you’re selling customized products, bundles, or personalized items and need more control than standard Shopify variants allow.
Final Thoughts
Adding a dropdown to your Shopify product page is a simple change that can make a big difference in user experience. It helps customers quickly understand their choices, reduces confusion, and creates a cleaner, more organized product layout.
As you’ve seen, there are multiple ways to achieve this — and the best one depends on your needs:
- If you’re just getting started and your product options fit within Shopify’s standard variant system, the built-in theme editor method is the easiest and quickest solution.
- If you need more flexibility, customization, or want to go beyond Shopify’s option limit, the Easify Custom Product Options app is a powerful (and beginner-friendly) alternative.
No matter which method you choose, always preview your product page, test the dropdown on both desktop and mobile, and make sure the selected options appear correctly in the cart and checkout.
A well-implemented dropdown doesn’t just improve design — it helps guide your customer’s decision, reduces friction, and can ultimately increase your conversion rate.


