
Nothing kills a sale faster than a customer falling in love with a product, only to find out it is out of stock after making a selection. Clear communication is essential for a high-converting product page. Shoppers should know instantly what is available to buy, without any guesswork.
If the goal is to improve user experience, this guide provides the perfect solution. It explores exactly how to cross out unavailable product options in Shopify effectively. This guide walks through the steps to automatically mark out-of-stock items, ensuring inventory status is always clear and keeps the shopping journey seamless.
Key Takeaway
- Visually crossing out unavailable variants prevents customer frustration by showing stock status immediately.
- Crossing out options is simple by setting the correct inventory, while hiding them completely requires a small code adjustment.
- Clearly marking sold-out options guides shoppers toward available products and helps reduce bounce rates.
Why You Should Cross Out Unavailable Options
Shoppers want to know exactly what they can buy the moment they land on a page. Clicking through multiple combinations only to hit a “Sold Out” message creates frustration and often leads to abandoned carts.
Crossing out unavailable variants eliminates this guesswork by providing instant visual clarity. This allows customers to identify their valid choices at a glance without wasting time on dead ends or invalid selections.
Ultimately, reducing this friction creates a smoother and more professional shopping experience. By guiding users directly to purchasable items, you keep them engaged and significantly improve the likelihood of a sale.
How to Cross Out Unavailable Product Options
There are two main ways to handle out-of-stock variants: visually crossing them out or hiding them from the list entirely. The best approach often depends on how strictly the store wants to guide customer behavior.
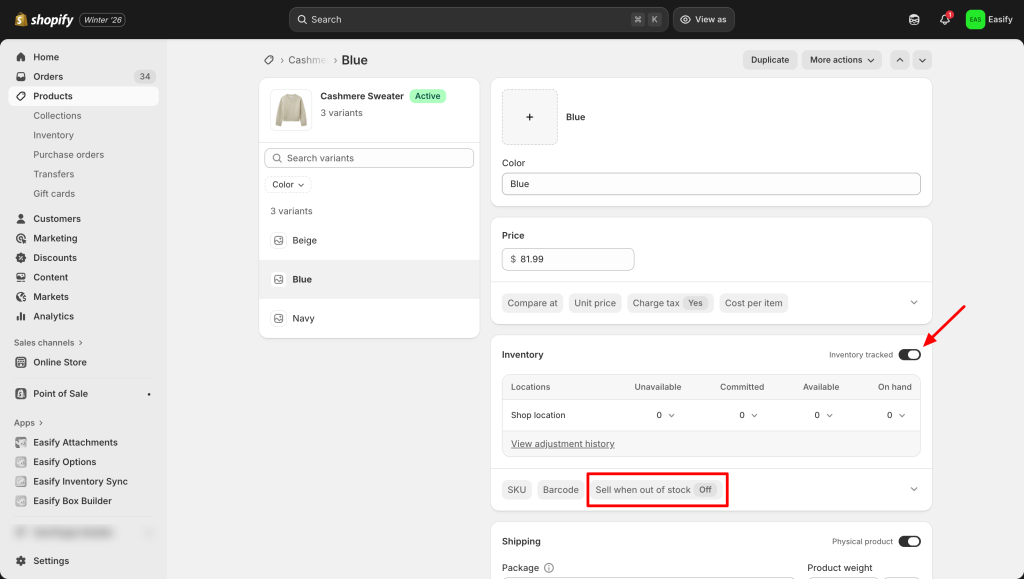
Method 1: Crossing out
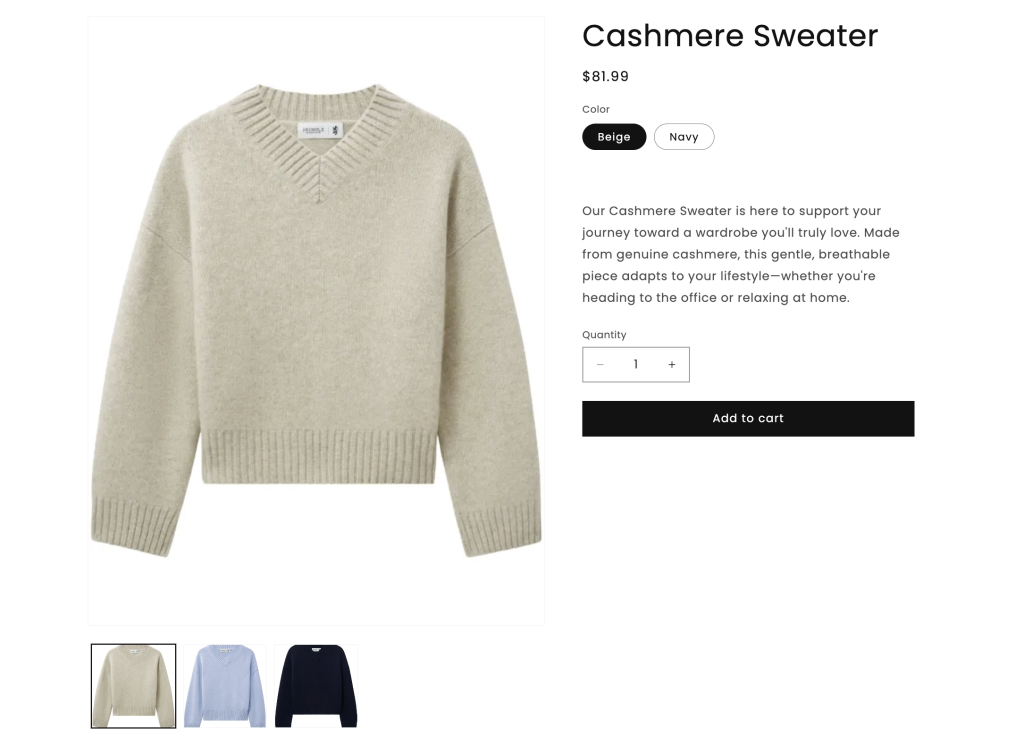
Achieving the standard “crossed-out” effect is usually quite straightforward. You just need to select inventory tracked and turn off the selling when out of stock option.
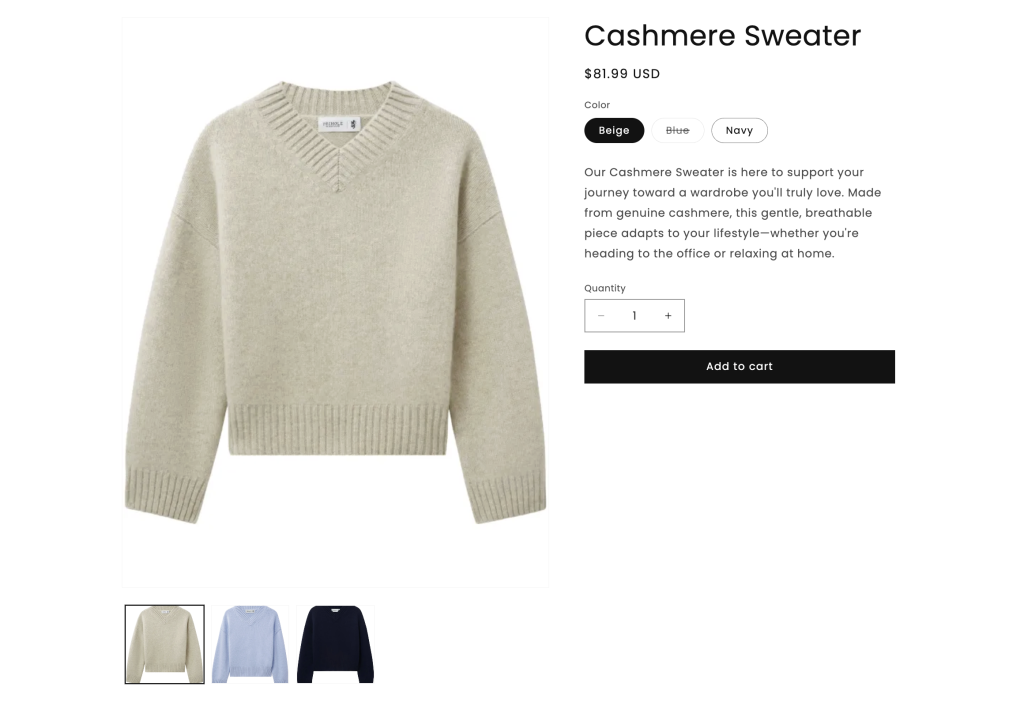
In front end, it will look like this:
Method 2: Hiding
While crossing out items is useful, some store owners prefer to hide unavailable options entirely to keep the product page clean. As mentioned earlier, this specific action usually requires a small amount of custom code.
The following guide provides the exact steps for the Dawn theme, though this method may also work for other themes using a similar structure.
Note: Editing theme code can be risky if you are not tech-savvy. Always duplicate your theme to create a backup before making any changes.
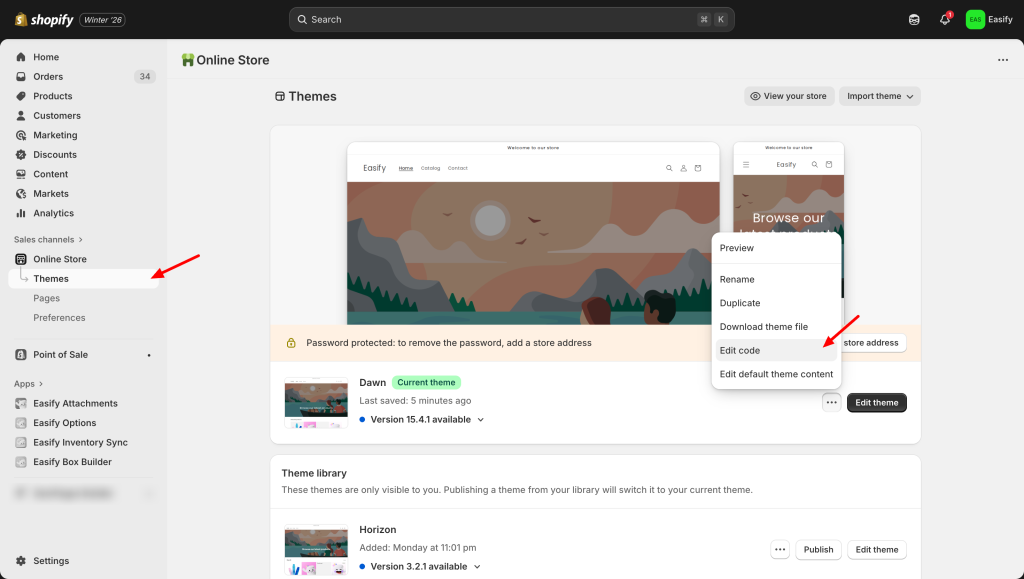
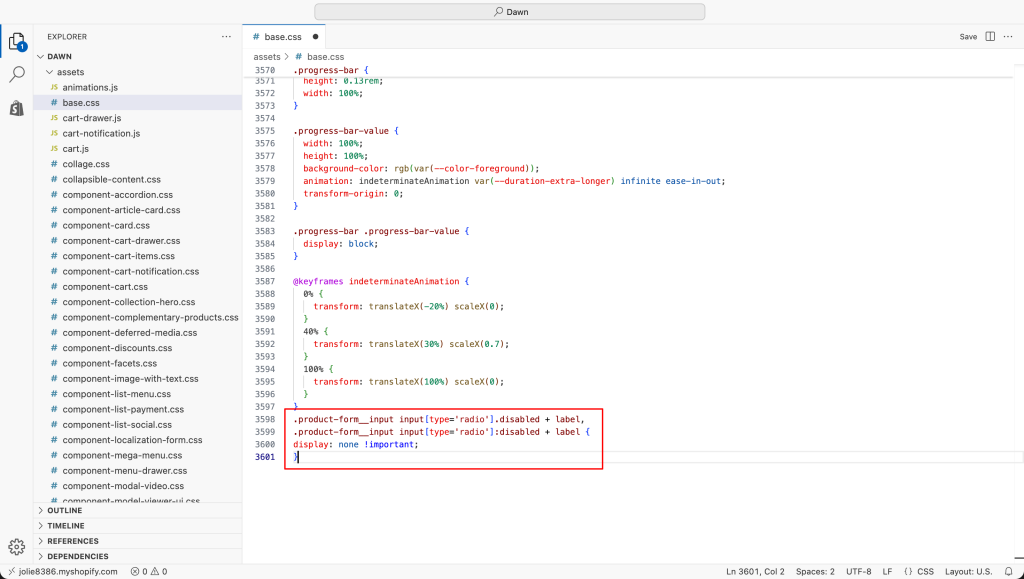
Step 1: Go to the Theme Editor
From the Shopify Admin dashboard, navigate to Online Store > Themes. Locate the current active theme and click the three dots icon and select Edit code. This will open the backend file directory.
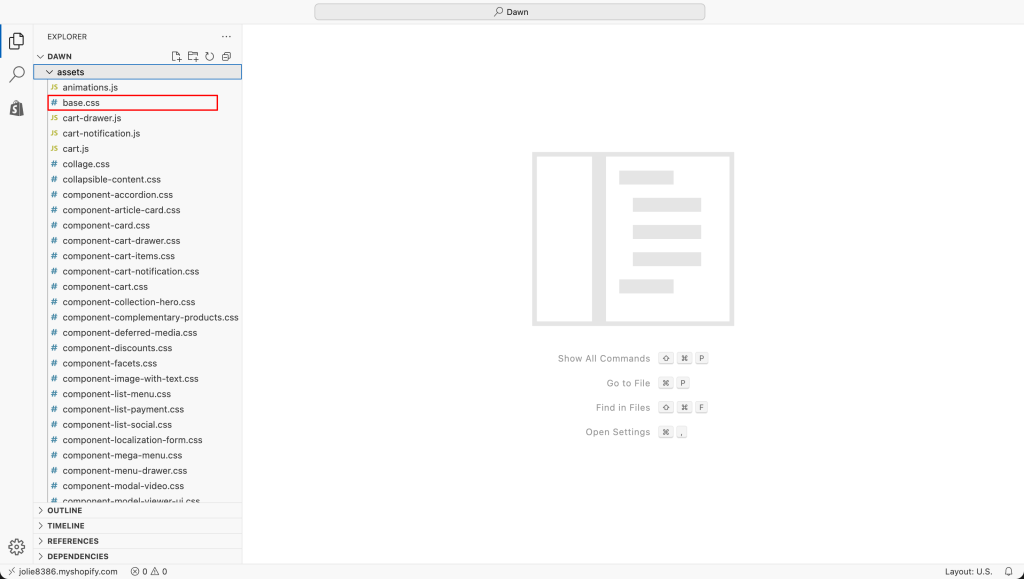
Step 2: Add the Custom Code
In the search bar on the left side, type base.css to locate the main stylesheet file (usually found in the Assets folder). Click to open it.
Scroll down to the very bottom of the file and paste the following code snippet:
.product-form__input input[type='radio'].disabled + label,
.product-form__input input[type='radio']:disabled + label {
 display: none !important;
}
Step 3: Save and Check
Click the Save button in the top-right corner to apply the changes.
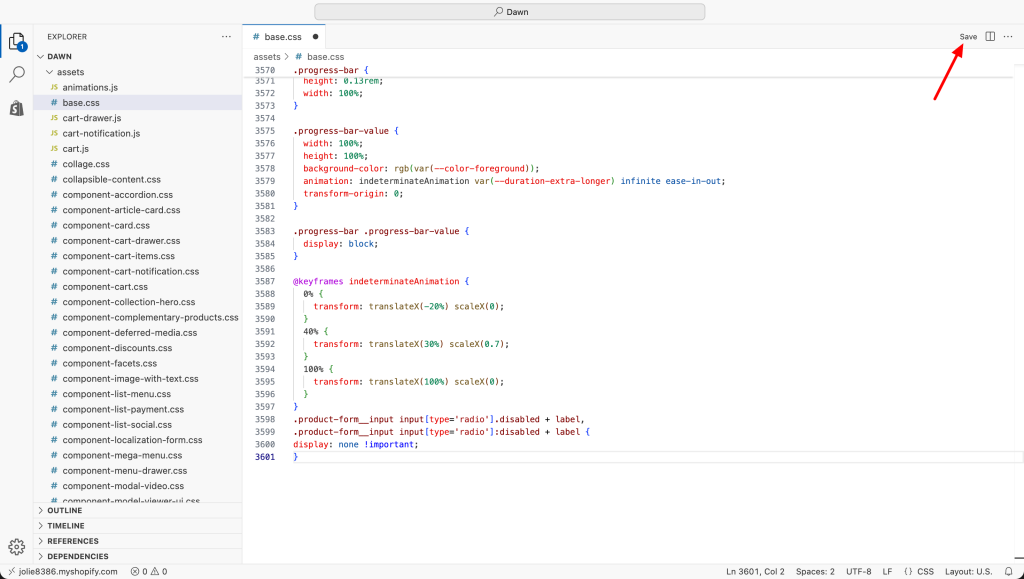
That is it! Navigate to the storefront and check a product page with out-of-stock variants. The unavailable options should now be completely hidden from the list rather than just crossed out.
The Easy Method: Using Easify Product Options App
For a safer, no-code solution, you can use Easify Product Options. This app allows you to hide unavailable variants with a simple click, ensuring your product page remains clean and professional without the risk of editing theme files manually.
With Easify Product Options, you have full control to create, manage, and remove custom options as needed. This flexibility gives you two simple ways to handle availability.
First, if you want to hide an entire option (e.g., a whole “Gift Box Selection” section), simply click the eye icon next to the option set to, or click the trash bin icon to delete. This will instantly disable it on the storefront.
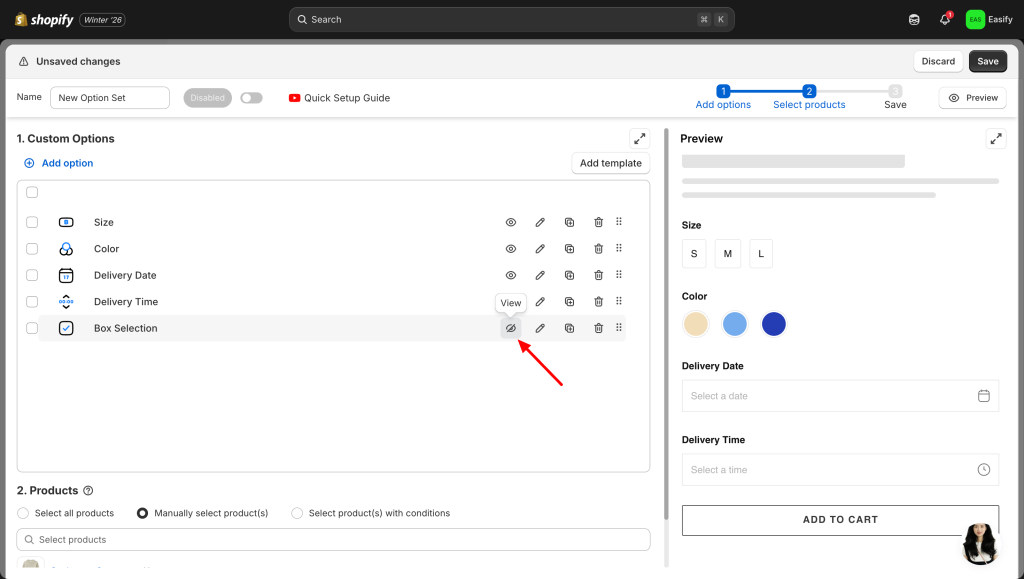
Second, if you only need to hide a single value within an option (like a specific color or material that is out of stock), click into the option settings and delete that specific value.
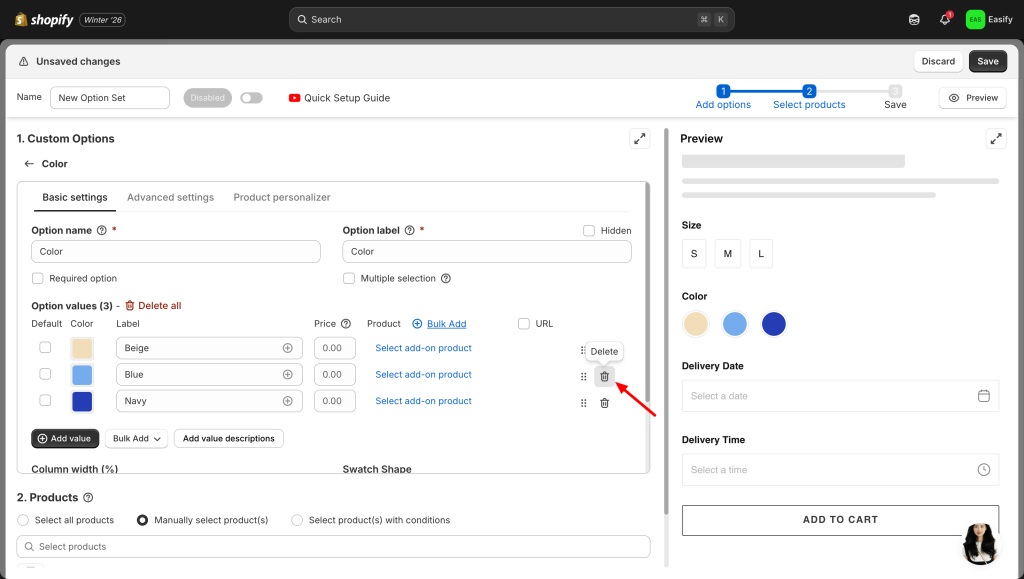
Since Easify options operate independently from your Shopify inventory, it is completely safe to delete a value temporarily and simply add it back later when it is available again.
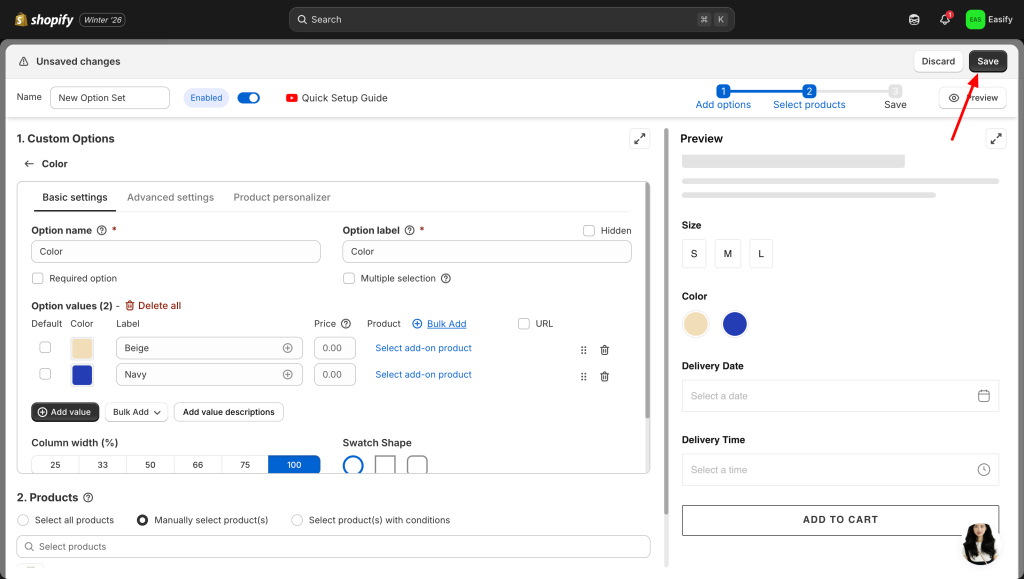
Finally, always remember to click Save to apply your changes. Once saved, the updates are instant.
Final Thought
Optimizing how out-of-stock variants are displayed is essential for maintaining a high conversion rate. Leaving customers to guess which combinations are available often leads to friction and abandoned carts.
By applying the steps outlined in this guide, the product page becomes much more intuitive. A frictionless interface not only looks more professional but also helps shoppers make faster purchasing decisions, ultimately improving the overall performance of the store.
If you found this guide helpful, check out these related articles to further optimize your Shopify store:


